The Details at the Edge: How Thickness, Profile and Overhang Decide Whether a Stone Worktop Works
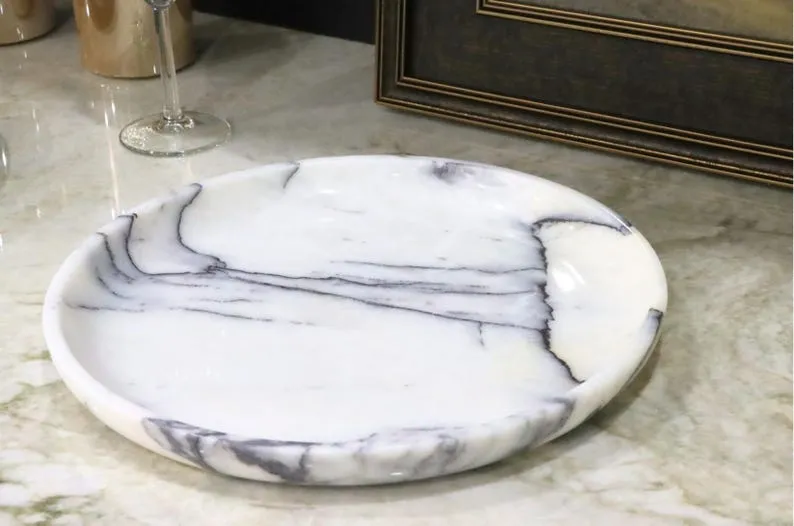
Photo: marble kitchen worktop edge profile close up undermount sink, via i.etsystatic.com
Most worktop decisions are made about the slab. The colour, the movement in the veining, the supplier, the price per square metre. The details that determine whether the finished kitchen feels considered — the thickness at the edge, the profile, the way the sink is cut, where the tap sits, how far the top projects — are usually settled in a short conversation with the fabricator, often after the slab has been chosen and most of the budget committed.
That ordering is the wrong way round. These are not finishing touches; they are the decisions that govern durability, cost, comfort and how heavy the kitchen looks. They deserve a proper thought before templating, not after.
Thickness is a structural question before it is a visual one
Stone is heavy. A 20mm slab of granite, quartz or marble weighs roughly 50 to 55 kilograms per square metre; at 30mm it is closer to 80. On a run of base units that weight is manageable, but around a sink cut-out, over a dishwasher gap or across the span of an island, it determines how much support rail and how many carcass fixings are needed.
Twenty millimetres has become the norm in UK kitchens, partly because it is easier to handle and cheaper to buy, and partly because a mitred edge can deliver the appearance of greater depth where that is wanted. Thirty millimetres offers more inherent rigidity and a heavier look, which suits a large, traditional room and can overwhelm a narrow galley. Neither is better in the abstract; the mistake is choosing thickness for appearance and then discovering that the island needs a steel frame to carry it.
The mitred edge, and the myth of visual weight
A mitre bonds two pieces of 20mm stone at forty-five degrees along the edge, producing an apparent thickness of 40mm, 60mm or whatever the design calls for. It is a genuinely useful technique, particularly on islands, waterfall ends and anywhere the edge is seen against a shadow. It is also fabrication work, charged by the linear metre, and it introduces a joint that must be matched carefully in a veined or highly figured stone.
Where the mitre disappoints is when it is used to make a modest kitchen look grand. In a small room, a deep apron edge plus a tall upstand plus a thick splashback can close the space in and make the worktop read as a heavy band rather than a surface. A plain 20mm edge with a slim upstand frequently looks calmer, costs less, and leaves the cabinetry to do the work.
Polished, honed, and the case for a small bevel
A polished edge on polished stone is the conventional pairing and looks correct on dark, reflective materials. It also shows fingerprints and chips, and a chip on a polished arris is conspicuous. A honed edge suits honed and matt surfaces and feels softer under the forearm, which matters more than buyers expect in a room where people lean.
Whichever is chosen, ask for a micro-bevel rather than a true square arris. A one to two millimetre bevel is almost invisible in use but removes the fragile corner that chips when a pan is set down too firmly. On marble and other softer stones it is close to essential.
Sink reveals and drainer grooves
On an undermount sink, the width of the stone reveal around the bowl is a design decision. Three to five millimetres is typical; a wider reveal can look deliberate and generous, but it also collects water and crumbs. The cut-out should have radiused internal corners rather than sharp right angles, which concentrate stress and are a common origin of cracks.
Drainer grooves are popular and rarely used. Cut into marble, they hold water against the surface and etch it; cut into any stone, they trap residue that a cloth will not reach. Where drainage is genuinely needed, a slight fall towards the sink or a separate drainer in another material is often the more practical answer. Inset sinks avoid the reveal question altogether and are worth reconsidering where the household is hard on worktops.
Taps: the hole nobody measured
A standard tap hole is 35mm in diameter, set back from the edge of the sink cut-out far enough for the spout to reach the bowl and for the lever to clear the wall or splashback. Two failures recur. The first is a tap whose handle fouls a window reveal or prevents a casement from opening. The second is a boiling-water tap specified without checking the position of the tank beneath and the clearance behind the unit.
Where a sink sits under a window, a lower-profile tap or a wall-mounted spout will often serve better than a tall mixer, even if the tall mixer photographs well. Confirm hole positions on the template drawing, in millimetres, before fabrication.
Overhangs, seating and knees
On a standard 600mm base unit, a 620mm worktop gives a small front overhang and a flush back. Where the worktop becomes a breakfast bar, the overhang has to provide knee room: 300mm is comfortable, 250mm is the practical minimum, and anything beyond about 300mm on a 20mm slab will need brackets or a leg. A 30mm slab is more self-supporting but is not magic; unsupported projections will deflect and, in time, crack.
Also check the working triangle rather than the photograph. An overhang that looks generous in a plan can leave a walkway too narrow for two people to pass, which is the sort of detail a household notices every day and a showroom never does.
Simplicity, specified properly
The honest conclusion is that the simpler edge detail usually ages best. A 20mm honed top with a micro-bevel, a modest upstand, an accurately set undermount sink and well-placed taps will look right in ten years and cost less than a theatrical mitre that was specified to add presence to a room that did not need it.
That simplicity still has to be drawn. Ask for the edge profile in millimetres, the reveal width, the tap centres and the overhang dimension on the template, and keep a physical sample of the finished edge rather than a photograph. The slab gets the attention; the edge gets the use.